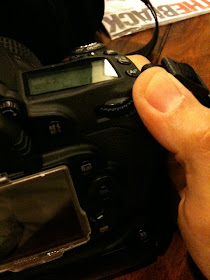
Here is a step by step guide, but its valid for Nikon D90 (which meant I no idea if it works the same way as for D40 to D80) only.
Step1: Press and hold the WB button and use the commander at the back (near my right thumb) to select to PRE.

Step2: Press WB button again

and hold down for 1second until the PRE blinks.

Step3: Place the Pringles cap INFRONT OF YOUR LENSE.

And SNAP! Object don't need to be in focus as the purpose is to capture incidental light into the camera sensor.
If the custom WB was successful, you will see a GOOD flashing. Now just simply press any button (i just press the shutter half way) and the camera has now recognised the WB as "calibrated" for that lighting condition.
Repeat Step1 to Step3 as appropriate when the lighting condition changes (like outdoor to indoor or outdoor sunny to outdoor evening).
However, don't do it if ypu intentionally want the WB to affect the mood of the picture - like you want warm color or blue tint.
If the custom WB blinked a
Other instances this font work is when the Pringles cap can't cover the whole lense front (larger than 77mm perhaps? I can't verify as all my lenses are 52mm now).
Good luck! Hope this help!!!

hey ur photog has improved. Keep it up! And happy belated anniversary!
ReplyDeleteJamie - thanks and it meant a lot coming from photog like you!
ReplyDelete